Demon Lord: Just a Block Blood Blade Guide
Last updated: July 19, 2026
The Blood Blade is the most ritual-gated weapon in Demon Lord: Just a Block — a blood-cursed blade that plays nothing like the other thirteen weapons. Instead of one swing per action, it fights as a four-strike chain that ramps from a humble headbutt into a room-clearing ring slash, with lifesteal and wall-phasing dashes available through its forge abilities. This guide covers the full unlock ritual, how every strike in the combo actually behaves, which abilities to take in what order, and the two builds the weapon supports best.
Blood Blade at a Glance
| Aspect | Detail |
|---|---|
| Weapon type | Melee combo blade — a blood-cursed weapon built around a four-strike chain |
| Unlock chain | Cat room (donate 30 blood) → Blood-Sucking Cat item → goddess statue → defeat the Blood Goddess |
| Signature trait | Four-hit combo whose damage ramps with every strike, ending in a wide ring slash |
| Lifesteal | Available through the Blood Thrust forge ability — the third strike steals health |
| Main weakness | Long recovery after attacking — you cannot dodge-cancel out of a swing the way Skull Gauntlets can |
| Best for | Sustain (lifesteal) runs and pierce-burst runs that herd enemies before the fourth strike |
How to Unlock the Blood Blade
The unlock is a three-step hidden ritual: a blood donation, a key item, and a hidden boss. None of the steps is marked on any quest log — the game expects you to stumble into the chain, which is exactly why so many players reach the credits without ever seeing this weapon.
Step 1 — The cat room
Donate 30 blood for the Blood-Sucking Cat
The chain starts in the cat room, one of the game's special rooms. Interact with the cat and choose to donate blood. Each donation trades away some of your own health, and you need to give 30 blood in total before the cat parts with the key item: the Blood-Sucking Cat. Do not start the ritual at low health with empty pockets — bring healing so the donation itself does not end your run.
Step 2 — The goddess statue
Use the cat item at the statue
With the Blood-Sucking Cat in your inventory, you need to find the room that holds the goddess statue. Players consistently report that this room shows up far more often while your current health is low, so hunting it on a battered run is more productive than hunting it at full HP — just keep one heal in reserve so a bad room does not kill you first. Stand before the statue and use the item to wake what sleeps behind it.
Step 3 — The Blood Goddess
Win the hidden boss fight
Using the item opens a hidden boss room: the Blood Goddess. Beat her and the Blood Blade is yours, permanently unlocked for future runs. The fight was tuned shortly after launch — the boss room was enlarged and her total health slightly reduced — so the arena gives you more room to step than early players had. Treat it like any boss: read the telegraphs, dodge or parry the wind-ups, and spend your emergency items instead of dying with them.
The Four-Hit Combo, Strike by Strike
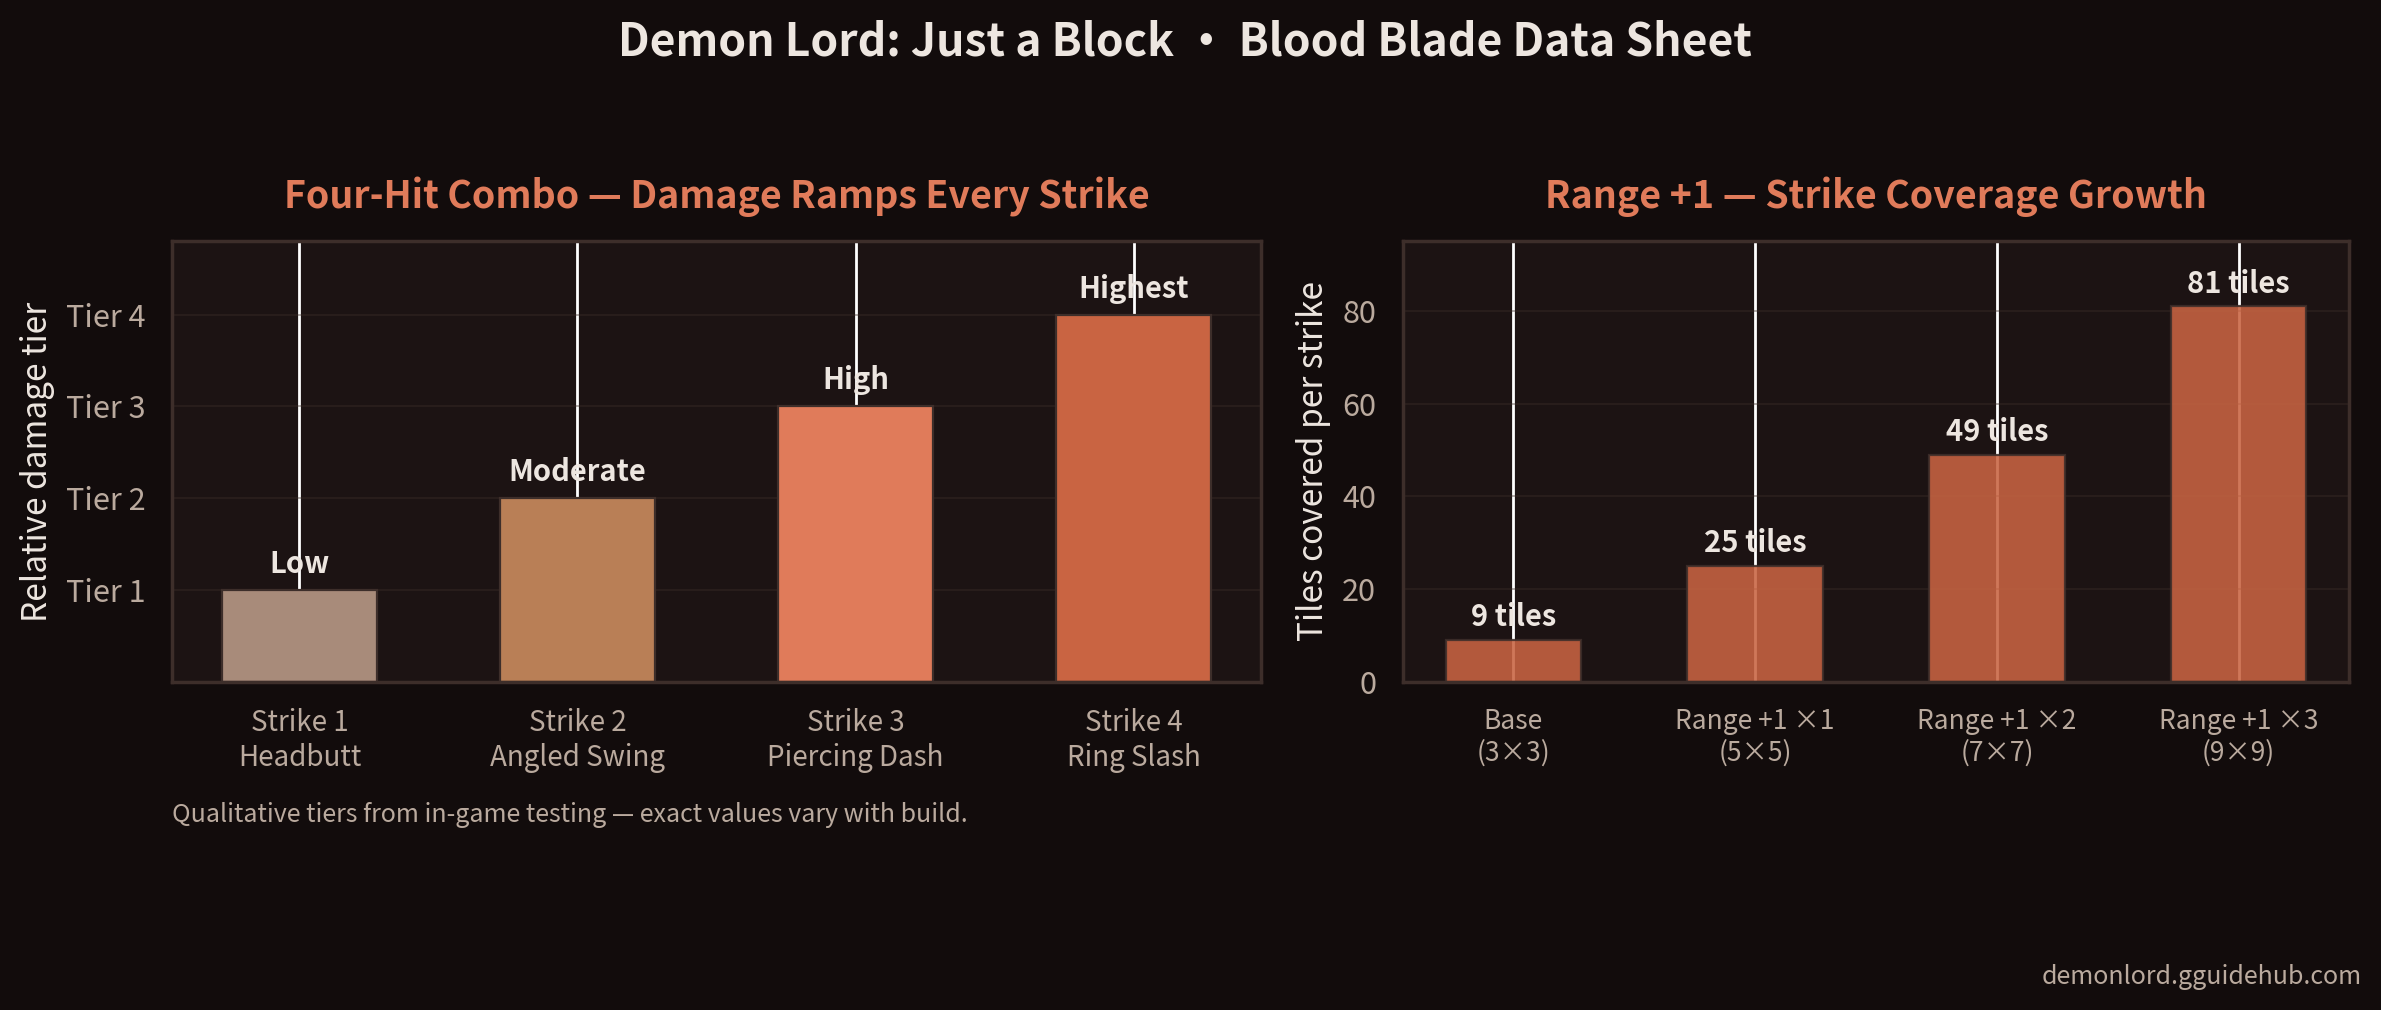
Every attack input advances the chain one stage, and each stage hits harder than the last. The first two strikes are unremarkable headbutt-class pokes; the chain only starts earning its keep at Strike 3, a piercing dash that behaves like the Lightning Chidori's lunge, and Strike 4, a circular slash that wipes everything hugging your tile. Two rules define the weapon: the chain resets to Strike 1 if you change direction or hesitate, and you cannot dodge out of a swing's recovery — every attack is a commitment.
| Strike | Action | Reach | Role | Damage |
|---|---|---|---|---|
| Strike 1 | Basic headbutt | Point-blank, single tile | Combo opener — deliberately weak | Low |
| Strike 2 | Small-angle blade swing | Close, frontal arc | Ramp-up hit, clearly stronger than the opener | Moderate |
| Strike 3 | Piercing dash thrust | Lunges forward like the Lightning Chidori | Single-target deletion — the kill shot against elites | High |
| Strike 4 | Wide ring slash | Full circle around you, roughly a starting greatsword charge in size | Room clearer — the highest-damage hit in the chain | Highest |
One quirk worth abusing: two quick attack inputs phase you straight through standard-thickness walls. It costs you the chain, but as an escape hatch or a shortcut through puzzle rooms it is one of the best movement tricks any weapon offers.
All Six Forge Abilities, Ranked by Priority
The Blood Blade's forge tree is what elevates it from a gimmick into a run-carrying weapon. Two abilities are effectively mandatory; the rest shape which build you are playing.
| Ability | Effect | Priority |
|---|---|---|
| Arena Four-Combo | The base forge ability — enables the full four-strike chain | Core (take first) |
| Endless Combo | Moving no longer breaks your chain, so you can chase enemies between strikes | Core — without it, mobile enemies deny Strikes 3-4 |
| Blood Thrust | Strike 3 steals 1 HP from the enemy it pierces | High — the engine of every lifesteal build |
| Range +1 | Strike coverage grows from a 3×3 grid to 5×5, 7×7, and 9×9 as it stacks | High — turns Strike 4 into a full-room wipe |
| Thrust Slash | Strike 3 dash distance +99 — effectively unlimited, piercing walls of any thickness | Situational — map control and escape, not raw damage |
| Blood Curse | While below 10 HP, every slash in the chain deals +3 damage | Situational — high-risk burst, pairs with Blood Thrust to heal back out |
The Two Blood Blade Builds
Lifesteal Sustain
The classic Blood Blade run. Rush Blood Thrust so Strike 3 starts paying health back, then add Range +1 so Strike 4 refunds the chip damage you take while herding. Play patiently: pull enemies into a cluster, walk the chain through them, and let the pierce and ring slash top you up. Blood Curse is the greedy finisher — at low HP your slashes hit harder while Blood Thrust climbs you back to safety.
Pick order: Blood Thrust → Range +1 → Arena Four-Combo upgrades → Blood Curse (optional greed pick)
Pierce Burst
The aggressive read on the weapon. Endless Combo and Thrust Slash turn Strike 3 into a wall-phasing execution tool: mark the most dangerous enemy in the room, dash through everything between you and it, and let Strike 4 mop up whatever followed you. You give up the safety of lifesteal, so positioning discipline matters more — the blade cannot dodge out of its own swing, and a botched chain leaves you standing still in a crowd.
Pick order: Endless Combo → Thrust Slash → Range +1 → damage cards that reward chained hits
Blood Blade vs. the Other Melee Staples
Context matters: the Blood Blade is a specialist weapon, not a default. Here is how it stacks against the melee options players usually already own when they unlock it.
| Weapon | Identity | Recovery | Unlock Effort |
|---|---|---|---|
| Blood Blade | Ramping 4-hit combo with lifesteal upside | Slow — no dodge-cancel after swings | Hidden ritual chain (cat room → goddess statue → hidden boss) |
| Skull Gauntlets | Two quick strikes per action, safe and steady | Fast — attack, then immediately dodge away | Passive — clear 10 rooms |
| Lancelot | Chargeable greatsword, huge single swings | Committed — charging roots you in place | Immediate — sword stand at the big tree in the forest |
| Death Scythe | Heavy reaper swings, run-defining power | Slow, but each hit is worth it | Hidden — kill the shopkeeper and win the boss fight it triggers |
Five Habits of Good Blood Blade Players
Herd before you swing. Strike 4 is a circle — its value is multiplied by how many enemies you gather before the chain starts. Walk a lap, pull the room into a clump, then commit.
Never panic-tap. Changing direction or hesitating mid-chain resets you to Strike 1, the weakest hit. Decide the full sequence before the first input.
Respect the recovery. The Blood Blade cannot dodge-cancel after a swing the way Skull Gauntlets can. If a telegraph appears mid-chain, finish on Strike 3 or 4 positioning rather than gambling on one more hit.
Two attack inputs phase you through standard walls. Use it to escape dead ends and to skip puzzle rooms that try to route you the long way.
Farm the unlock on a strong run. You need 30 spare blood for the cat and enough health left to survive a hidden boss — attempting the chain on a doomed run wastes both.
Frequently Asked Questions
How do you unlock the Blood Blade in Demon Lord: Just a Block?
Through a three-step hidden ritual. First, find the cat room and donate blood — 30 blood in total — until the cat gives you the Blood-Sucking Cat item. Second, locate the room with the goddess statue and use the item there. Third, defeat the Blood Goddess, the hidden boss this summons. The Blood Blade unlocks permanently once she falls.
How much blood do you have to donate in the cat room?
30 blood in total. Each donation costs you health, so do not start the ritual while already weak — grab healing items first. Think of the 30 blood as the price of the key item, not as one transaction: you are trading short-term HP for a permanent weapon unlock.
Why does my Blood Blade combo keep resetting to the first strike?
Because the chain is unforgiving about interruptions. Changing direction or pausing mid-sequence sends you back to Strike 1, the weakest hit in the combo. The Endless Combo forge ability fixes the most common cause — it stops movement from breaking the chain, so you can chase enemies between strikes and actually land Strikes 3 and 4.
Is the Blood Blade better than the Skull Gauntlets?
They reward different players. Skull Gauntlets strike twice per action and let you dodge immediately after attacking — safer and more forgiving. The Blood Blade hits much harder by Strike 4, clears groups with its ring slash, and can lifesteal through Blood Thrust, but its long recovery means every swing is a commitment. Pick the gauntlets while learning boss patterns; pick the blade when your positioning is good enough to cash in the bigger payoff.
Can I miss the Blood Blade unlock in a run?
The unlock is permanent once you beat the Blood Goddess, but the ritual rooms are per-run spawns — you may not see both the cat room and the goddess statue in a single attempt. Players report the statue room appears more often at low current health. If a run never offers the rooms, simply finish or bank the run and try again; nothing about the chain is one-shot missable.
Related Guides
Last updated: July 19, 2026. Unlock chain, combo behavior, and forge abilities verified against the current release version of Demon Lord: Just a Block. Unofficial fan guide.